In this tutorial we will add labels above input fields in the Divi Contact Form module. The Divi Contact form by default does not show labels above the input fields it only shows the name of the field inside them.
It is really easy to show the labels with some simple CSS code because the labels are present on the contact form they are just hidden by default.
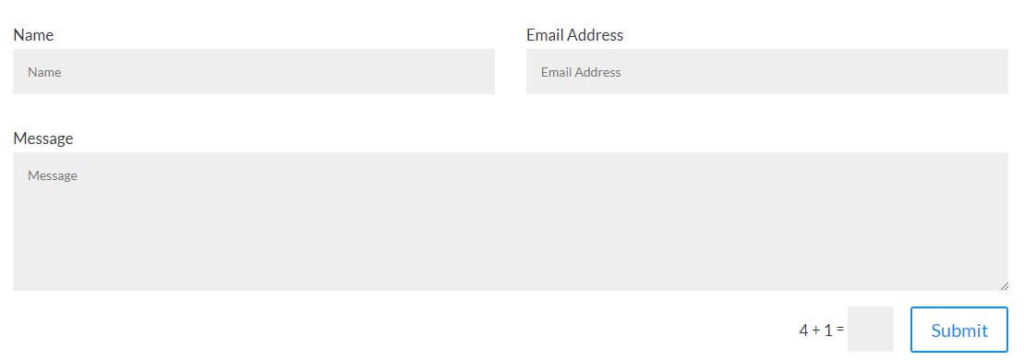
At the end of this article you should have labels on the top of your contact form fields like the screenshot below.
So lets get started
1. Add CSS Class to the Divi Contact Form Module
The first thing you need to do is add a CSS Class to the contact form module so that we do not apply the code to all the contact forms on your website.
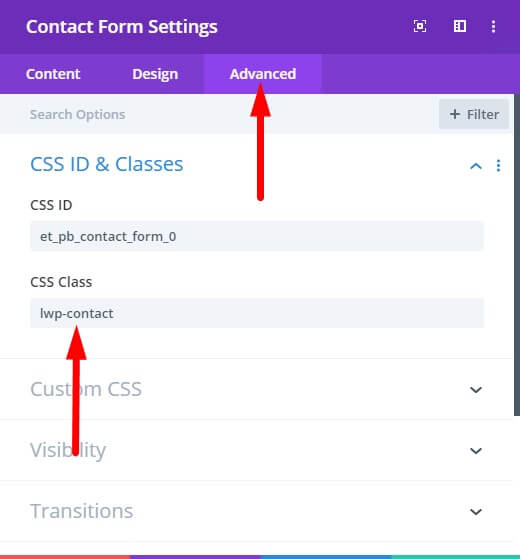
Open the Contact Form Settings > Advanced > CSS ID & Classes > CSS Class and then enter lwp-label-contact.
Have a look at the screenshot below to understand where to add it inside the Contact Form settings.
2. Add CSS Code to Show Labels In Theme Options
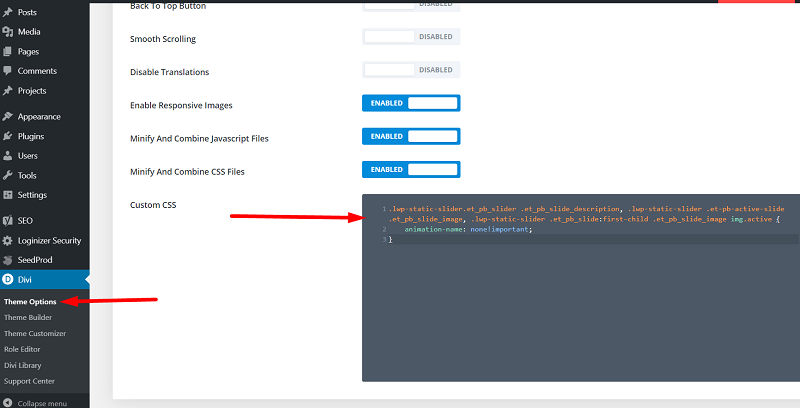
Next go to your WordPress Dashboad > Divi > Theme Options > General > Custom CSS and then add the following CSS Code.
.lwp-label-contact .et_pb_contact_form_label {
    display: block;
}
If you are having trouble finding the right place to enter the code then please have a look at the screenshot below. You need to add the code in the Custom CSS field and then save the Divi theme options.
If you want to start showing labels on all the contact forms on your website and want to skip adding a CSS Class to each contact form then you can use the following CSS code instead.
.et_pb_contact_form_label {
    display: block;
}
This will add the labels above the input fields on all the contact forms on your website.
After you add the code you will have label on top of the fields and then the same text inside the fields as a placeholder. If you don’t like this duplicate information in your contact form then there is simple solution to this problem.
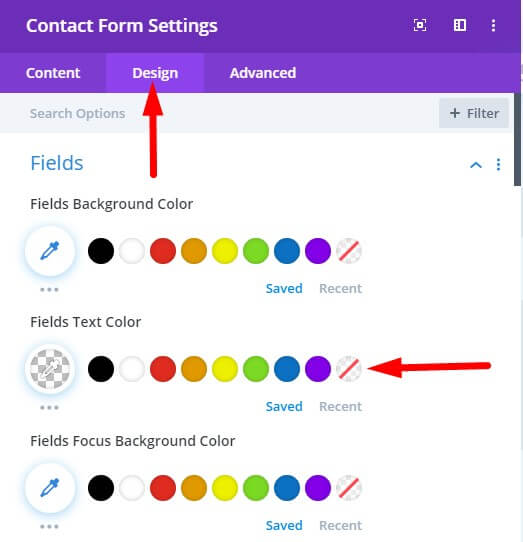
Open your Contact Form Settings > Design > Fields and set the Fields Text Color to Transparent.
3. Styling the Label Text
Right now there are no settings in the Contact Form module to style the label text so lets say if you want to change the color, size or font weight of the labels then you will need to use CSS.
To change the color, size and font weight you can add the following code in your Theme Options in addition to the code shared above.
.lwp-label-contact .et_pb_contact_form_label {
    color:#ff0000;
    font-size:16px;
    font-weight:bold;
}
This code includes the custom CSS Class for the module so if you are trying to change it for all the contact form modules then all you need to do is remove the text .lwp-label-contact from the code.
Leave a comment below if you found this helpful or have any questions. Don’t forget to subscribe to the Newsletter to receive the latest tutorials in your inbox.
Hi,
Are you still in business?
I found a few errors on your site.
Would you like me to send over a screenshot of those errors?
Regards
Joe
(714) 908-9255