In this tutorial I am going to show you how to add a Font Awesome Icon to the Divi Menu. This is a followup to the How to Add Icons in the Divi Menu tutorial.
Instead of adding the default Divi Icons we are going to add Font Awesome Icons to the Divi Menu. The steps are more or less the same. The only difference is that you need to install the Font Awesome plugin on your website to use the Font Awesome Icons while the default Divi Icons are already included in the theme by default.
If you are not familiar with Font Awesome then to put it simply they offer over 1500 Icons for free that you can use on your website.
Now lets get started with the tutorial.
1. Install the Font Awesome Plugin
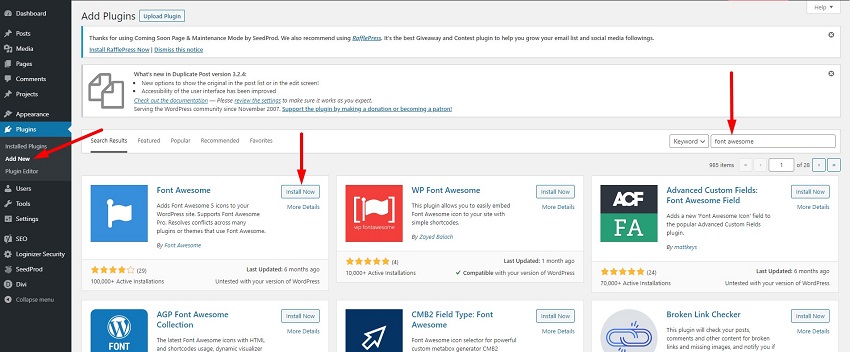
Font Awesome has an official WordPress plugin. You can download it from the Font Awesome plugin page or install the plugin directly through your WordPress Dashboard.
Once you activate the plugin you do not need to do anything else. Just installing the plugin is enough to start using the Icons on your website.
2. Copy the Icon Code
Next you need to find the code for the Icon from Font Awesome website. They have a pretty good search feature to help you find Icons. Make sure that you are looking through the Free Icons as Pro Icons are only available to Pro Members.
For this tutorial I am going to use the Rocket Icon. The code to display the Icon are present on the individual Icon pages.
Clicking on the code will copy it to your Clipboard. For the Rocket Icon the code is.
<i class="fas fa-rocket"></i>
3. Add Code to Navigation Label
Now all you need to is just add the code to the Navigation Label for the menu item where you want to show the Icon.
Just go to your Dashboard > Appearance > Menu. Open the menu item to which you want to add the Icon and add the code at the start just like the GIF below.

After adding the code to the Navigation Label. Save the menu and then check your website. The Icon should start appearing in the menu.
The size of the Icon and text combined can be change at your WordPress Dashboard > Appearance > Customize > Header & Navigation > Text Size
However if you want to set a different font size for the Icon compared to the text of the menu then copy the CSS code below and paste it at your WordPress Dashboard > Divi > Theme Options > General > Custom CSS
header .fas {
    font-size: 24px;
    vertical-align: middle;
}
If you want to set a different color for your Icons from the menu items then you can use the code below.
header .fas {
    color: #0000ff;
}
The #0000ff value can be changed to change the color of all icons in the menu.
Leave a comment below if you found this helpful or have any questions. Don’t forget to subscribe to the Newsletter to receive the latest tutorials in your inbox.
How do I make the font awesome ison to open in a new window?