We are going to make the Custom Divi Header created using the Theme Builder or Divi 4.0 Fixed or Sticky in this tutorial. It has become really easy to make the custom Divi header fixed after the 4.2 update to the Divi theme which added the Position Options. The Position Options were added to all the modules in the Divi builder.
Fixed Header Using Position Options
To make a Section in your Custom Header Fixed you need to open the Section Settings for the section, then go to Advanced > Positions > Position and set it to Fixed and set the Location to Top Center.
That’s it, if you check your header on the front end now then it should scroll with you as you scroll down the page.
Fixed Header Using CSS & jQuery Code
The Position Options make it really easy to make the header fixed however they do not allow us to change the styles of the header on scroll like the default Divi Header does.
To be able to change the styles for the header after scroll we are going to need to use a solution that involves jquery.
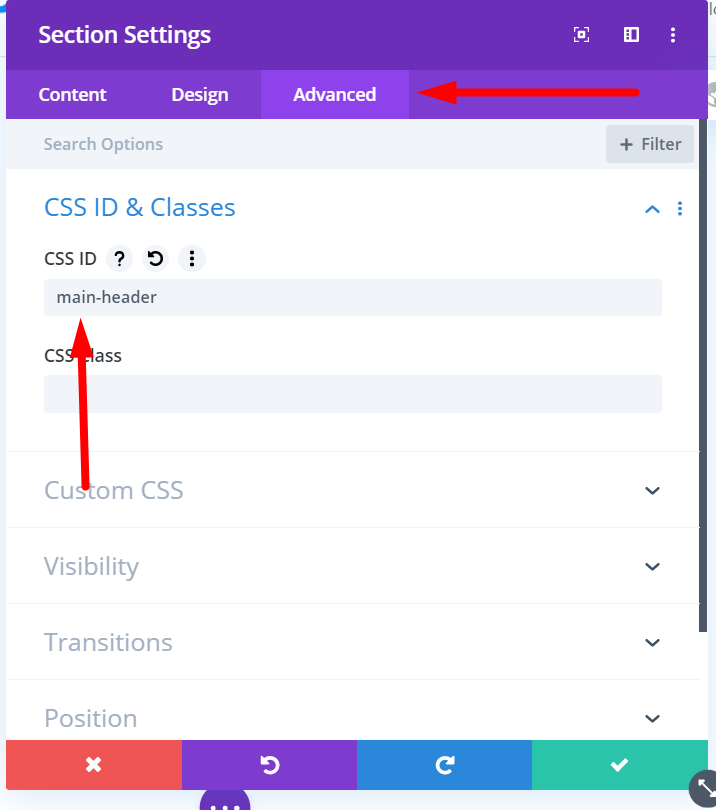
Open the Section Settings for the Section which you want to make sticky. Go to Section Settings > Advanced > Custom CSS ID & Classes > CSS ID and add main-header in the CSS ID field.
Then go to your WordPress Dashboard > Divi > Theme Options > Integration > Add code to the < head > of your blog and add the following code.
<script>
jQuery(function($){
$(function() {
    //caches a jQuery object containing the header element
    var header = $("#main-header");
    $(window).scroll(function() {
        var scroll = $(window).scrollTop();

        if (scroll >= 0) {
            header.addClass("et-fixed-header");
        } else {
            header.removeClass("et-fixed-header");
        }
    });
});
});
</script>
This code will add the CSS Class et-fixed-header to the section dynamically as soon as you scroll down and remove it when the header is back at the top.
The code above just adds the class but does not make the section fixed. To make the Section Fixed on scroll go to your WordPress Dashboard > Divi > Theme Options > Custom CSS and add the following CSS Code.
#main-header.et-fixed-header {
    position: fixed;
}
The CSS Code will make the header fixed dynamically and now we can target the et-fixed-header CSS Class to update the styles for the fixed menu.
If using the Fullwidth Menu module the code below can be used to change the background color for the menu and the text color for the menu items on the fixed header.
/*Background color of the menu in fixed header*/
#main-header.et-fixed-header .et_pb_fullwidth_menu{
    background:#000000;
}

/*Color of the menu text in the fixed header*/
#main-header.et-fixed-header .et-menu a {
    color:#ff0000;
}
The et-fixed-header can also be used to target any other elements in the section and change their styles on scroll.
Don’t forget to subscribe to the Newsletter to receive the latest tutorials in your inbox. Leave a comment below if you found this helpful or have any questions related to this tutorial.
0 Comments